 |
CPU | Intel MMX-Pentium 200MHz |
| VIDEO | NeoMagic MagicGraph128XD/2MB | |
| LCD | 12.1inch/TFT 800x600/64k | |
| Max.RAM | 32+128MB(3.3V/128MB 144pinEDO-DIMM) When you use 128MB of DIMM, you must configure the video resource manually. |
|
| HDD | 2.1GB(Max.8GB?) | |
| Modem/Sound | Crystal sound/56kbps | |
|
Interfaces: 1 Serial, 1 pararell, 1 modem, FDD, PCMCIA(2-type2s or 1-type3),IrDA(115.2kbps), 1 USB 1.1 drivers are here. |
||
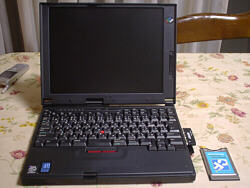
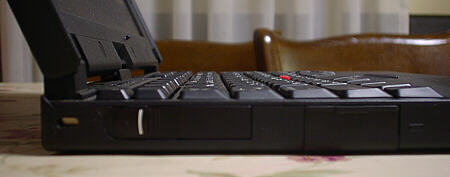
ThinkPad560(TP560/560E/560X/560Z) have their fame with their good touch in keyboards. Unless they are relatively old model, many users still love this machine and use it. Recently I've got used 560X at the first time,and I understand the reason. It's a masterpiece in its keyboard indeed. |
|
 |
|
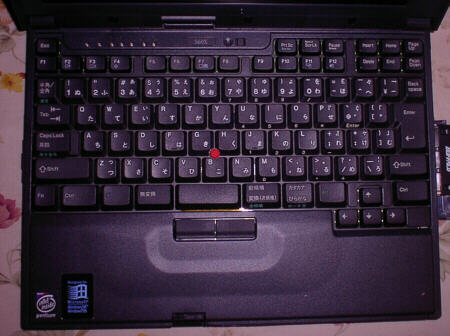
The keyboard of ThinkPad560X. Someone says "It's a little bit solid to be easy to type." but I or people who get used to write with typewriter feel it so good. Compared with ThinkPad535, its keytop and key pitch are larger than 535's. |
|
 |
|
|
ThinkPad560X has 12.1inches TFT panel(65J[650]/70J[700],60J has DSTN panel). It's very easy to see. I wish if it could display XGA..... I heard the panel is so tough that it's hard to break. |
|
   |
|
|
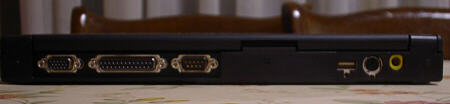
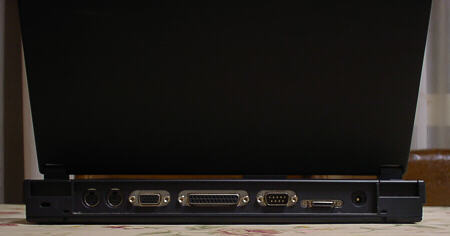
Back/Left/Right side panel of ThinkPad560X. 560X/560Z has USB1.1 port on the back panel. IrDA I/F is between power switch and FDD I/F on the left side. I want to place it on back panel so that it can easily access to ISDN public phone with IrDA I/F. |
|
 |
|
|
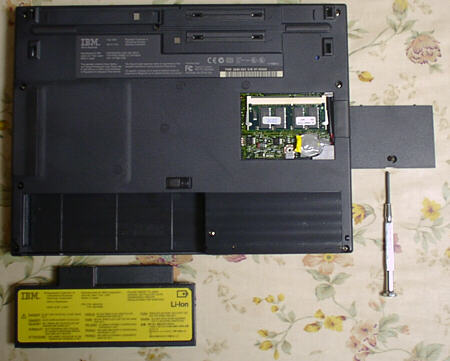
Bottom of ThinkPad560X. Memory module is covered with thin plastic panel. I am afraid if it's happend to be humidity hazard on wet table. |
|
 |
|
|
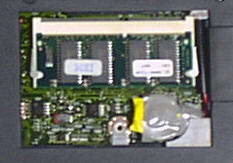
144pin EDO memory module is available on ThinkPad560X. BIOS backup battery is under the memory module. the voltage is 3V. If you can't get genuine parts, CR2016 can be applied with some customization. Because TP560X has no back-up batteries for stand-by mode, you must turn off or make it get into hibernation mode before you change its main battery-pack for a charged one. |
|
 |
|
|
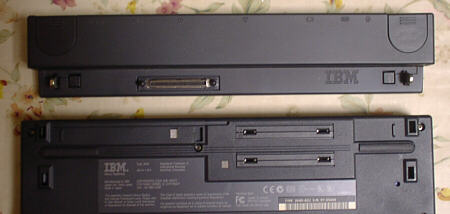
ThinkPad560 series has a port extender "Port bar".(FRU P/N 05K4645) This connects to back of ThinkPad560. |
|
 |
|
|
I/Fs of "Port bar". Adding to 560's I/F on each sides(except IrDA), it has ps/2 keyboard I/F. But when you connect "port bar", it obstracts USB I/F. |
|
 |
|
|
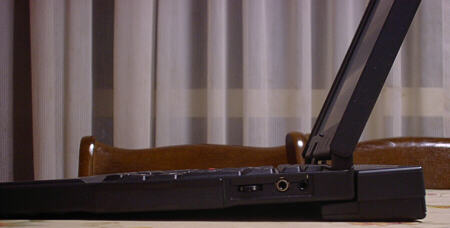
When the "Port bar" is applied, there becomes a little slant on keyboard. |
|
 |
|
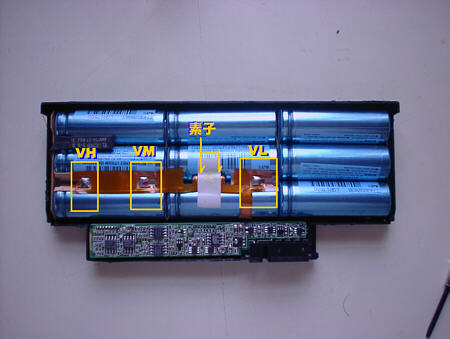
hyper-discharged battery pack *** ThinkPad560's battery pack has 9 A&TCGR17500 cells (3x3). It's more tolerant than PanasonicCGR17500 which is contained in ThinkPad535's battery packs. But once the battery pack is hyper-discharged, you can't chage it again. To recover from this problem, You must "Katsu-ire(I'ts a technical term in Judo which means 'Re-vitalize')" the cells. (Caution!: Old Li-ion Battery cells are very dengarous for the possibility of explosion or fire with its metal lithium slug. There are no responsibility to me for any accidents that are caused by your customization on your PC's battery packs. Please do it on your own risk.) First of all, open the battery pack. The cover is fastened with tough glew, and there are 5 hooks in the cover like above that's very delicate and easy to break. Moreever, it contains small controller plate and thin flexible cable and that's also easy to break. Open it carefully with (-)drivers and so on so that not to break it. (I couldn't do like this. There are 2 hooks broken...) |
|
 |
|
The controller and cells are connected with thin flexible cable. VG and another VH terminal are under the cells. Disconnect the cable from the terminals of cells with soldering iron. Don't heat it too much(or the cable will be melted). There are two unknown elements in the middle of the cable (under the tape:expressed in Kanji"So-shi[that means 'a element']"). |
|
 |
|
|
VG terminal under the cells. It need not be disconnected in this work. |
|
 |
|
|
Another VH terminal under the cells. It had better be disconnected so that not to damage to the controller during this work. |
|
 |
|
|
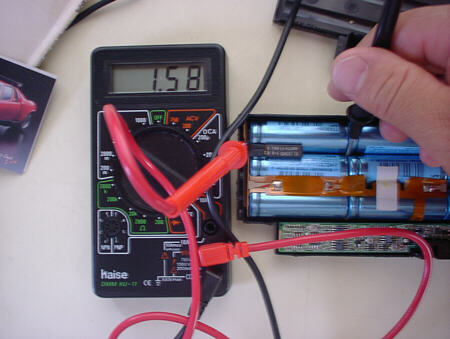
The cells of my battery pack generate 1.5-1.6V in each pararells. If the voltage is 0V, cells have died completely and can't be restored. |
|
 |
|
|
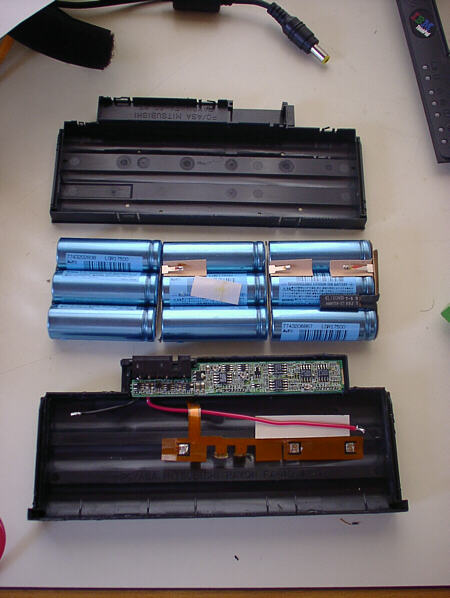
I dissembled the pack in three like this(bottom&controller/cells/cover). As wrote before, it doesn't need to be dissembled like this during this work, but the restoration of cells is easy to work in this situation. |
|
 |
|
|
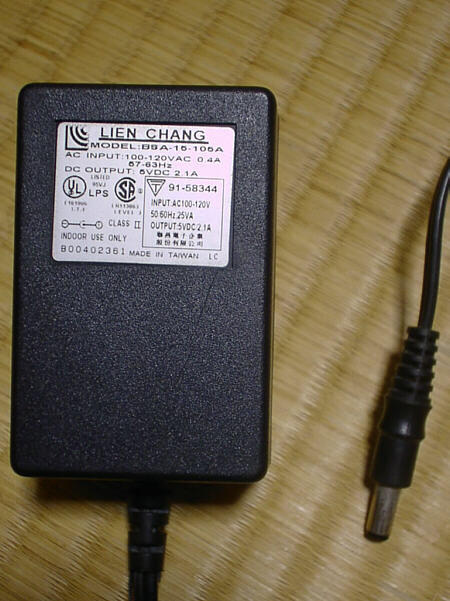
The main process of restoration of the pack is to charge the cell directly. (Caution Again!: It's VERY DANGEROUS to charge Li-ion Battery cells directly without charge controller circuit. That easily makes cells explode or fire with its metal lithium slug or its overheat. There are no responsibility to me for any accidents that are caused by your customization on your PC's battery packs. Please do it on your own risk.) DC power supply that can loads 5VDC/more than 1A is needed for the sufficient charge to cells. I used AC-DC power adaptor for 10BASE-T ethernet hub. This can loads 5V/2.1A. |
|
 |
|
|
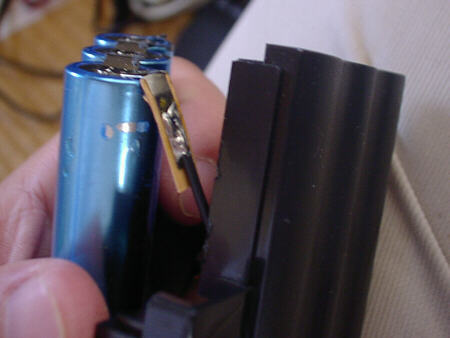
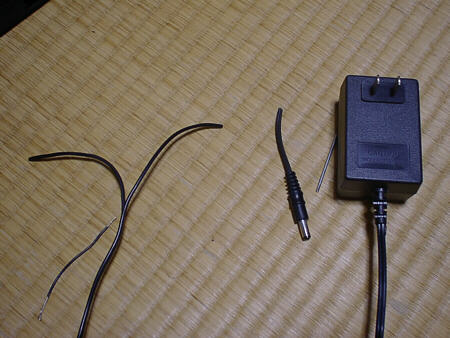
I cut the connector and stripped the cords. And I touched both cords to each poles of pararell cells(VH-VM,VM-VL,VL-VG) and charge, mesuring voltage of cells. When the voltage rises to 3.6-3.7V, it's finished. I touched it with my finger, not to make the cells overheated.(If the temperature of cells rises so highly that is hard to be in touch with finger, the crisis is coming near....) According to some infomations from other web sites, it's sufficient to charge about 5minutes with 5V/1A. Maybe because my AC-DC adaptor can loads 2.1A, it took only 2-3minutes to charge. |
|
 |
|
|
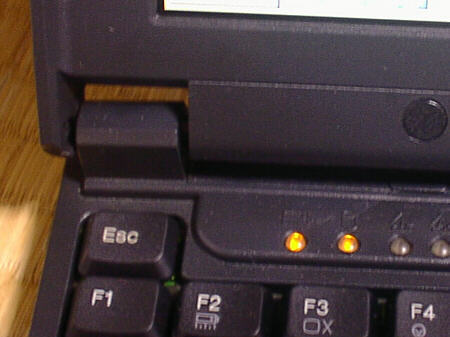
When the charge to cells was finished, I resembled the battery pack and apply to ThinkPad560X and connect AC adaptor of ThinkPad560 to this PC. If the charge to the cells are sufficient and the revitalization is succeeded, Battery indicator glows in orange and stops blinking(that shows the status that battery pack charges normally). If it's not sufficient, the indicator blinks and the battery packs can't charge. |
|
 |
|
|
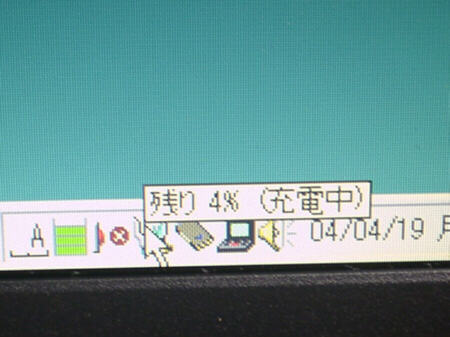
The power status on the icon tray shows "4%remains(charge)". |
|
 |
|
|
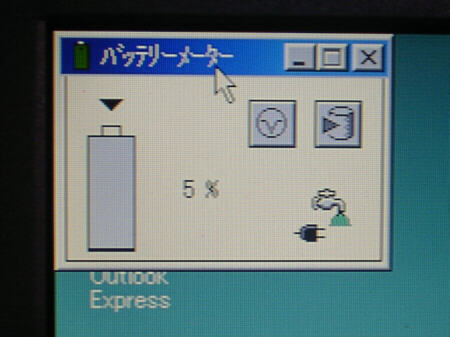
The battery meter tool also shows that the pack charges normally. If the battery is fresh, it takes 1-1.5hr to charge full. My battery pack took more than 2hr in slow charge(operation charge) and my ThinkPad560X runs more than 1.5hr with this pack. It's triumph!!(^^)v |
|
 |
|
|
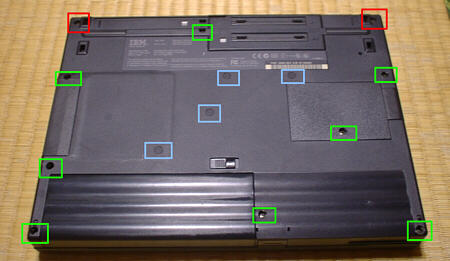
ThinkPad560 has a very tough body, and also has a stable and easy-to-typing keyboard because the body is made of FRP and is fastened many screws. There are 14 screws on the bottom. The 2 screws in red square are longer than others. 4 screws in blue square are covered with black seals and they fasten keyboard. If you will upgrade HDD or maintain keyboard, you must loosen all of these screws. When you loosen all of the screws and remove keyboard cover(palm rest), you can see keyboard and HDD inside. |
|
 |
|
|
When you use ThinkPad560X for a long time, sometimes you feel the TrackPoint's button is hard to respond. Sometimes it's caused by a stain of a point of contact. So you may restore it by cleaning the contact point like below; 0: Disconnect 2 flexible cables of keyboard(keyboard/Trackpoint) from the connectors on the system board, and remove keyboard. 1: loosen the 2 micro screws (in green square) with #0000 (+)driver and remove TrackPoint button. You must do it carefully and not do with other drivers!(or you'll crush the screw easily....) 2: If you don't have #0000 screw driver and can't do like #1, skip the process and flip up the button(1). 3: You can see a flexible cable fastened with glew. Remove it carefully(2). 4: Clean the contact point under the flexible cable (near by green circle) with a cotton swab and so on. Please don't shave it with sharp device like screw drivers. 5: Put the flexible cable on the exactly same place under TrackPoint button. If you put it on a little bit different point, "Error 301(keyboard not found)" indicates when you boot up the system and it won't boot up. |
|
 |
|
|
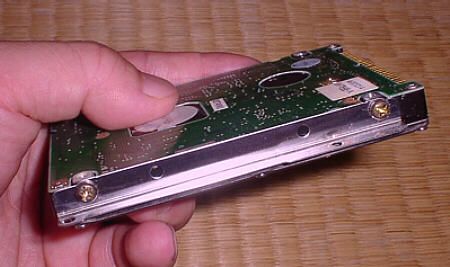
ThinkPad560X contains 2.5inches x 12.7mm HDD. The maximum size of HDD which ThinkPad560X can recognize is 8.4GB. The HDDs which are larger than 8.4GB can recognize by using a HDD utility like "Disk Manager". But when you use it, hibernation function is not available. As you know, ThinkPad560X can't be changed battery pack when it is in "Stand-by" mode(if you enforced to do it, the power must turn off and the data those who don't save fades away....), so I didn't recommend to use over 8.4GB of disk drive with those tools if you will use ThinkPad560X as a mobile computer. |
|
 |
|
|
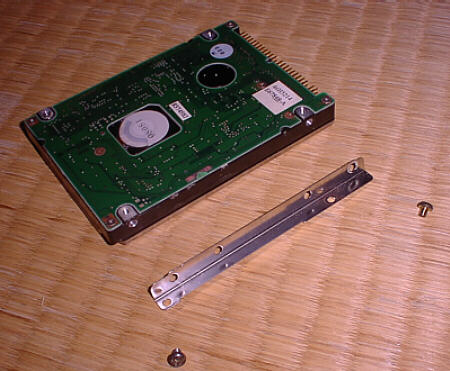
HDD is fastened to the frame with a metal pillar. Fasten it like this. |
|
 |
|
|
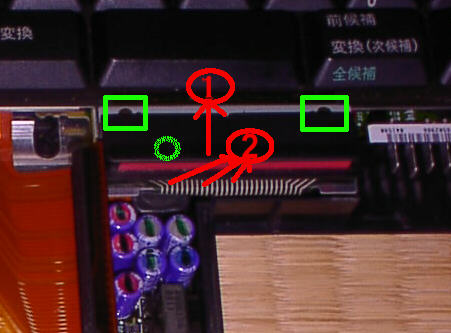
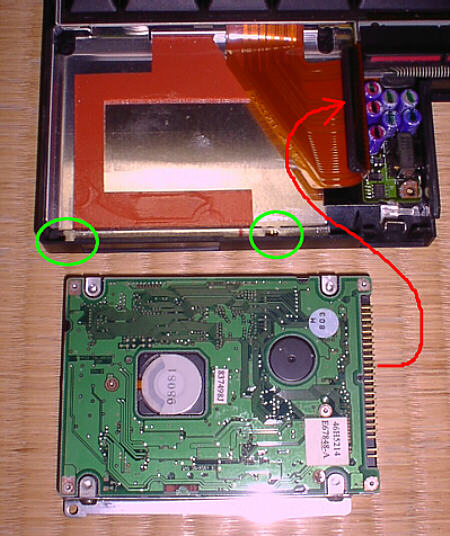
Connect to the cable and fasten to the frame. The cable is a flat flexible cable and very easy to break. Be carefully when you connect or disconnect HDD. You fasten the screw on only a hole of the right side. The left side one is a through hole and fasten from the bottom to keyboard cover. |
|
|
Others: |
|
| IBM in town | |
| My ThinkPads | |