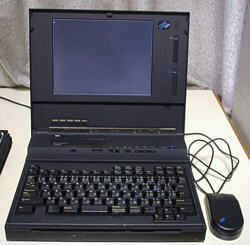
ThinkPad550BJ(TP550BJ) is one of the most unique machine in ThinkPad series, with its internal printer. I heard that it was Japanese domestic model as well as ThinkPad555BJ, the following model of TP550BJ. I think it's the way Japanese people think who live in the conpact house and office, and like arrangement of their enviroment.
Anyway, it's convinient to handle the printer with PC indeed. If the shape is a little smaller than this, more people must use this PC, I guess.
|
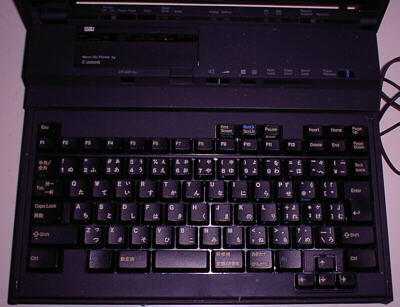 |
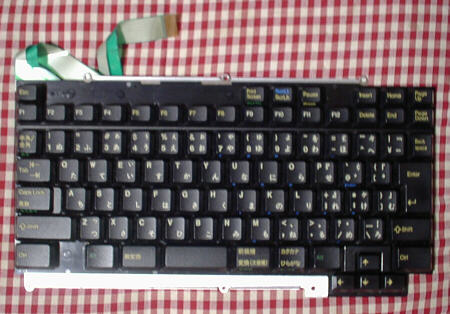
TP550BJ's keyboard.
Different from TP555BJ, it doesn't have TrackPoint.
|
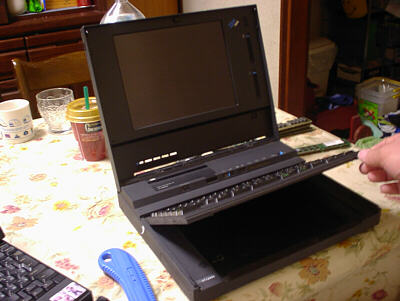 |
You can flip up the keyboard.
Paper is feeded from the slit under the keyboard. Paper can be set up to 10pieces.
If you forget to slide "Paper Release" switch to the right, paper can't be feeded to printer.(I often take this mistake....)
|
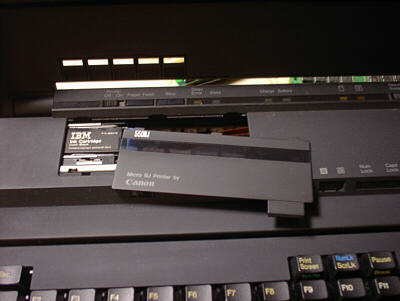 |
Printer section was devoloped by Canon Inc. It was based on "Canon BJ-10v".
But the ink cartridge and ink head is typical.
|
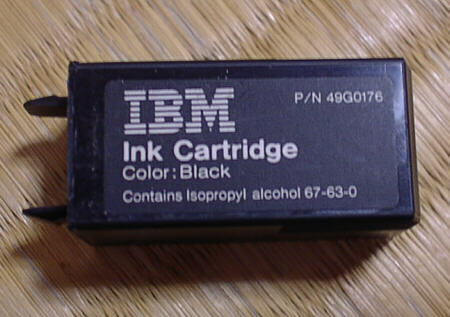 |
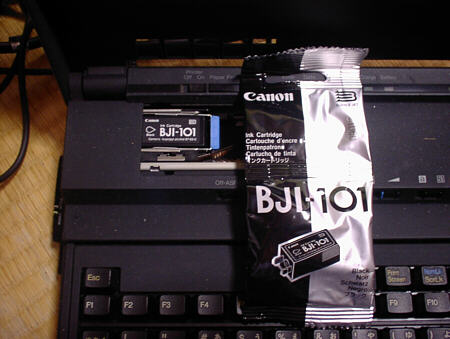
IBM genuine printer cartrige (P/N:49G0176) is hard to get today. Its production has been already finished. "BJI-101" cartrige by Canon (picture below) is still on sale. If you can't get it, chargable ink for "BJ-10v" may be available.
|
 |
|
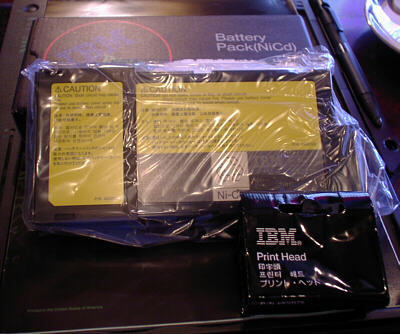 |
"Print head" (P/N:49G1075) is the most difficult to get in supply products for TP550BJ.
I got it with Ni-Cd battery pack in this picture at "Net Cycle", the junk shop in Akihabara. There remains few heads there in Mar.6 2004.
The battery is new, but was made in 1997. So the cells are already ruined.
|
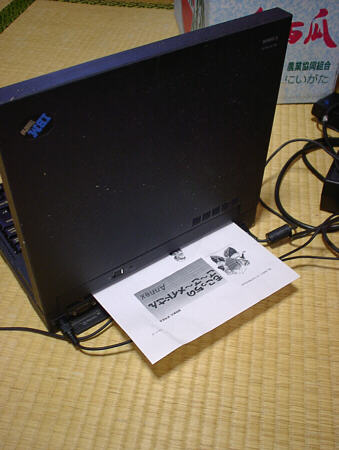 |
Paper is exhausted from the back.
IBM windows3.1J has the driver of this printer as "Canon MicroBJ printer".
On Windows95, the driver of "Canon BJ-10v/10vLite" can be used, but the upper blank that is printed out is different from in the applications.
|
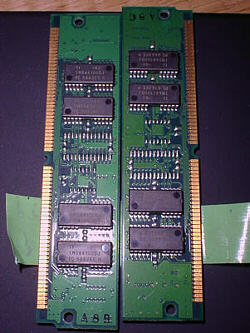  |
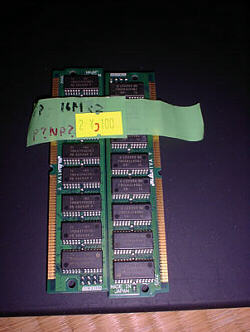
550BJ's memory can upgrade only with genuine memory modules. Usually 16MB of common FastPageMode 72-pin SIMM can't be recognized by the system. But some of them (with parity) can be recognized with some customizations.
|
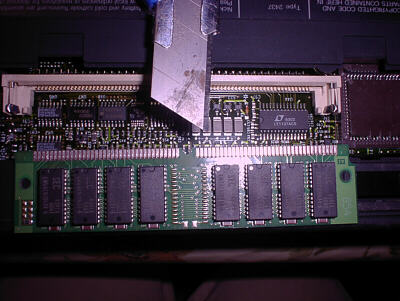 |
IBM genuine SIMM for TP550BJ's cut in the center of it is larger than that of common SIMMs'. First of all, this cut must be enlarged by cutter or so to be able to install to the memory socket on TP550BJ.
|
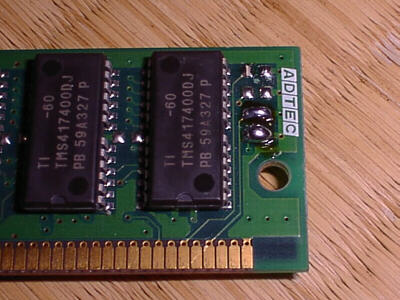 |
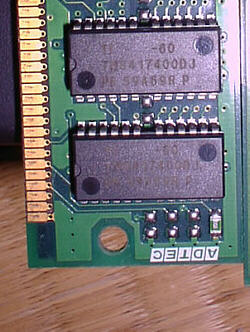
And then, change the SIMM-ID.
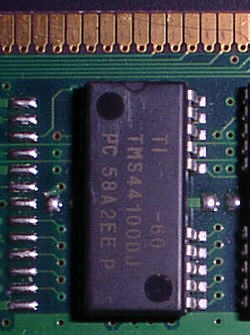
ID is set by the Jumpers on SIMM. Many of 16MB of SIMM have the pattern below;
ID0:on
ID1:off
ID2:off
ID3:off
then I moved the chip jumper like below;
ID0:off
ID1:off
ID2:on
ID3:on
Every SIMM module isn't recognized by TP550BJ by this customization.
For more information, See here.
|
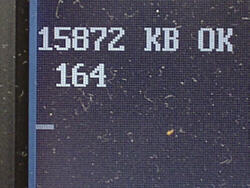 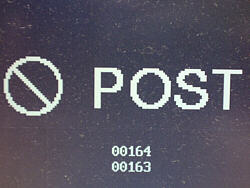 |
When TP550BJ boot up with this module, error "164" is shown ("163" is 'CMOS battery is low) and "POST" is displayed. This is an "Error of unknown SIMM".
|
 |
When you check the memory on this BIOS menu, error must be reported. But if you press "ESC" to start the system when "POST" is displayed, The system boot up normally like above;
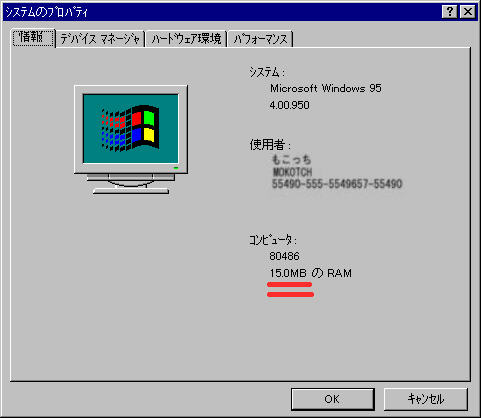
16MB is maximal memory that IBM486SLC can recognize.
Display is monochrome like below, but the captured picture is 16 colors.
|
 |
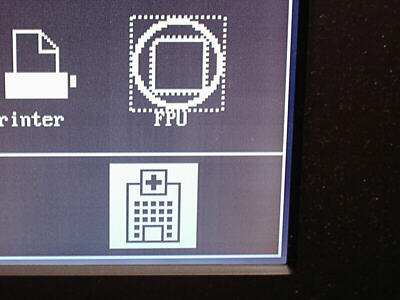
TP550BJ is unique ThinkPad not only because it has internal printer, but because it also has a coprocessor socket.
Available FPU is i387sx or conpatible. Socket is placed side by side on memory module.
|
 |
Insert like picture above.
|
 |
Test.
|
 |
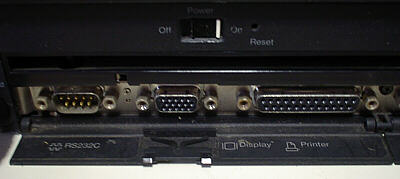
Back panel of TP550BJ.
TP550BJ is based on AT-architecture. There is a AT-external bus.
But now, I never see a external AT device at any "Junk shop in Akiba".
|
 |
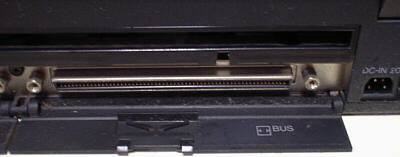
Instead of AT external bus, TP550BJ has 2 PCMCIA I/F card slots.
Regard to this I/F, I can connect this PC to LAN and internet.
|
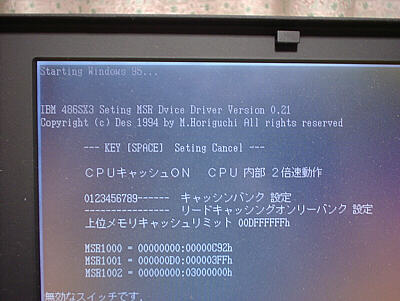 |
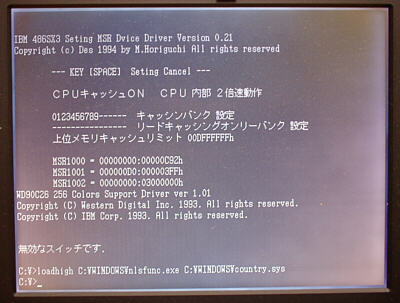
TP550BJ's CPU is IBM486SLC. This CPU can multiplize the bus clock.
In default setting of TP550BJ, this function is desable. You can enable this by some freeware.
One of them is "IBM 486SX3 seting MSR Dvice Driver" by "M.horiguchi" (Originally this tool is made for PC-9801, but it also works on IBM-PC/AT compatible).
|
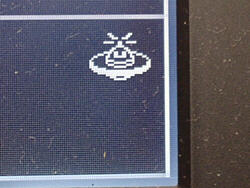 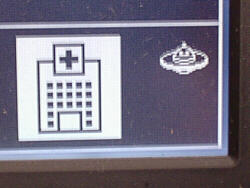 |
Sometimes You can see UFO in BIOS. I don't know how it appears, but it may appear when some hardware error occurs.
|
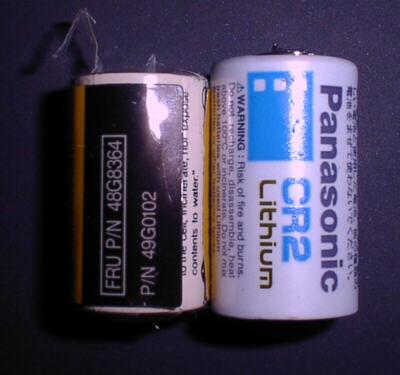 |
CMOS backup battery (FRU#:48G8364) is 3V of Lithium battery. But it's a little smaller than today's common 3V cells.
|
 |
I changed 48G8364 for CR2016. Regard to this, TP550BJ can hold the "date", but can't hold the proper "time". I don't know why....
|
 |
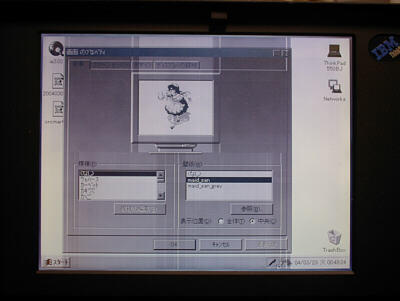
TP550BJ has Western digital WD90C26 video cntroller chip and 512kbytes of VRAM. So it can display 256 colors on external CRT. If you make it show in 8bit ccolor mode, you need to copy "v256.sys" on TP550BJ's HDD and add a line to "config.sys" like below;
....
device=c:\himem.sys......
device=c:\emm386.exe.....
....
....
device=c:\himem.sys......
device=c:\v256.sys
device=c:\emm386.exe.....
....
|
 |
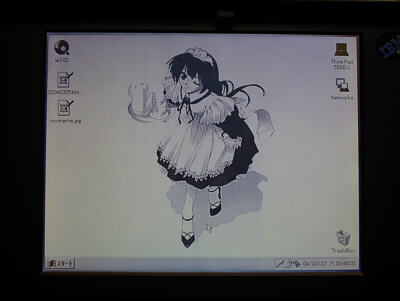
You can see the 8bit picture smoother than 4bit mode even on internal monochrome LCD.
But perhaps beacuse the LCD can only 16 levels of gradation, it shows many shadow lines when the dialog box is drawn on the desktop.
|
 |
One day, I turned on ThinkPadd550BJ if it worked correctly. But some of the keys doesn't work. Keys that can't be operated are "z,x,c,v,'Enter' and ]".
As wrote above, TP550BJ's keyboard can flip up so that the paper can be inserted from the slit under the keyboard. So the break of flexible cable is suspected. So I tried to dessemble it to find the point to go wrong.
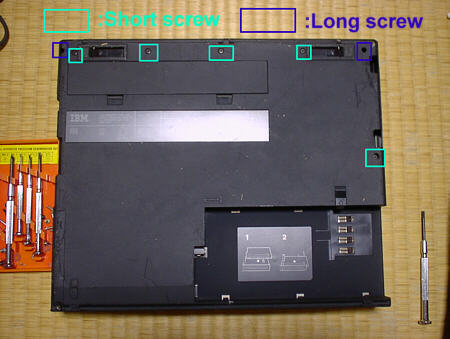
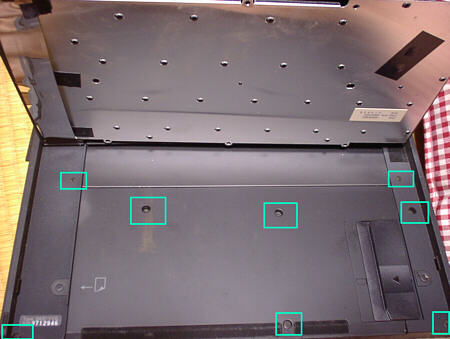
The upper unit and lower unit of TP550BJ are fastened with 2 long (+) screws and 5 short one from the bottom, 8 screws from under the keyboard, and a screw on the rear connector panel. The screws' size are #0 or #00. Loosen it carefully with a micro screw driver so that not to crush the screw top.
|
 |
When the keyboard is fliped up, you can see 8 screws. Loosen it.
Then you can separate the upper block of TP550BJ and lower block.
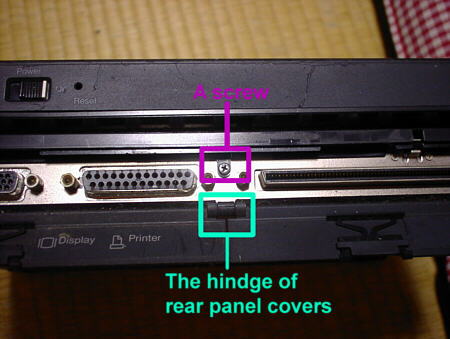
(But be carefull! There are a screw on the back panel fastening the upper block's cover. And more, the hindge of back panel covers are very easy to break if the unusual power is enforced to it. you should remove 2 back panel covers before separating the 2 blocks.)
|
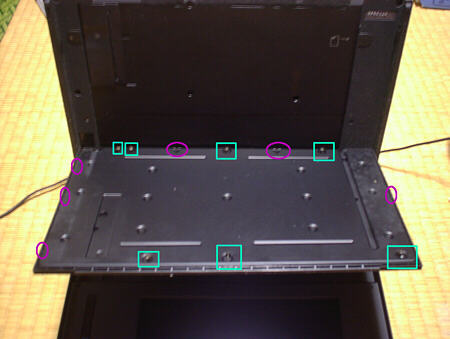 |
The picture above is the bottom cover of keyboard. It is fastened with 7 (+) screw nails(#0 or 00). loosen it carefully.
When all screw nails are removed, the bottom cover can be removed. But it is also fastened with 6 (or more?) hooks and they must be broken if you enforced to remove. Do it carefully with (-) micro drivers.
|
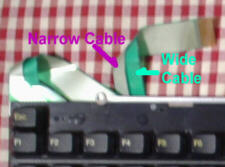  |
The 2 flexible cables connecting keyboard and system board can be seen on the left side of the keyboard. The cables sneak into the bottom through the slit at the left side.
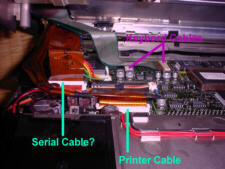 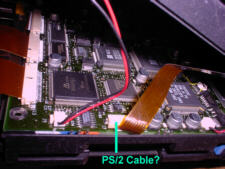 |
There are 5 flexible cables connecting between upper block of TP550BJ and lower block. You'd better disconnect all of the cables when you maintain the system board or so on not to break the cables.
Mr. tako-san, my friend and a design engineer of electlonic circuit taught me like below;
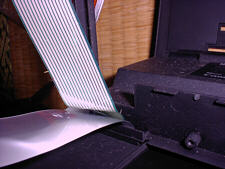
1) Most of wire breaks of flexible cable were occured on the fold point of the cable.
2) And failure of connect is often caused by being pulled off the edge of the cable.
3) Those couldn't be seen with one's eyes.
Then I try to spread the fold line, press and clean the edge and connect the cable again. Then.... I've succeeded....sometimes. But sometimes I've failed....I have to resemble the keyboard to restore the system completely. But the supply of TP550BJ's FRU from IBM has already finished. So I can get it by only a chance to meet it at some junk shops.
|
|
Others:
|
| IBM in town |
| My ThinkPads |